Submit your email address to get a link for quick download on your desktop and get started!
In this article, we will consider four different ways of forwarding USB devices from a host PC to a Hyper-V virtual machine and compare the pros and cons of each method. If you are not ready for a long read, just start sharing USB in Hyper-V in a few clicks with USB Network Gate. Otherwise, read on to know more.
USB Network Gate enables almost any USB device, such as dongles, pen drives, smartcards, printers, webcams, etc. to interface with a Hyper-V virtual machine. It can use any networked computer with a physical USB connection as a host for Hyper-V USB devices.

Microsoft Corporation designed Hyper-V to run on the Windows Server Core and offers only a command-line interface. Consequently, installing third-party software on it may be challenging, but not with USB Network Gate that comes with a built-in CLI in addition to a more user-friendly GUI.
For a lot of customers that want to use USB devices in their virtual machines, Hyper-USB V's compatibility is a serious worry. The lack of such a capability severely restricts the applicability of Hyper-V-based systems.


Using USB Network Gate to mount and access Hyper-V USB devices to a Virtual Machine is easy, fast, and convenient.

Users will find their USB peripherals in the virtual machine’s Device Manager window, allowing them to access the devices with the same level of control they would experience if the device was physically connected to the computer they’re physically working from.
Pros:
Cons:
Using server-side redirection, you can connect a USB device to the Hyper-V host machine. As a result, the device would be accessible to the Hyper-V virtual machine as though it were physically linked to it.
Server-side Hyper-V USB passthrough is not without its advantages and disadvantages as outlined below.
Pros:
Cons:
The following procedures outline the process of enabling server-side Hyper-V USB passthrough.
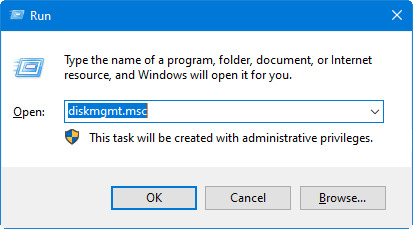
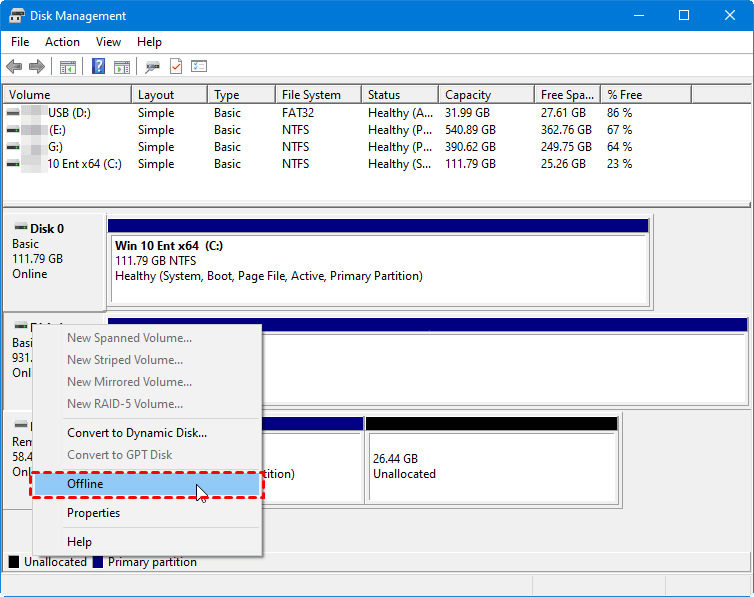
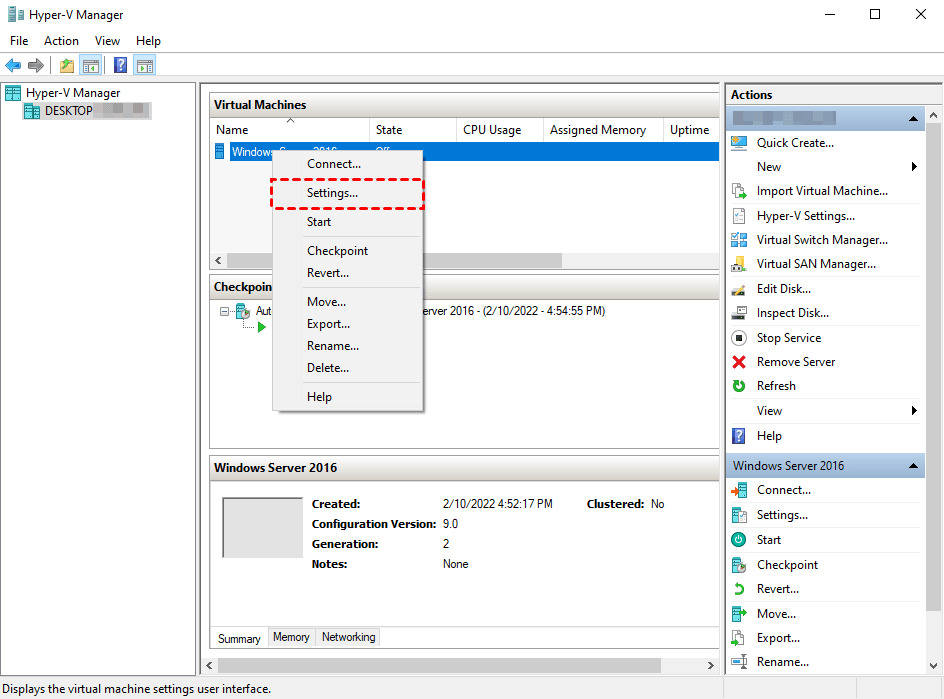
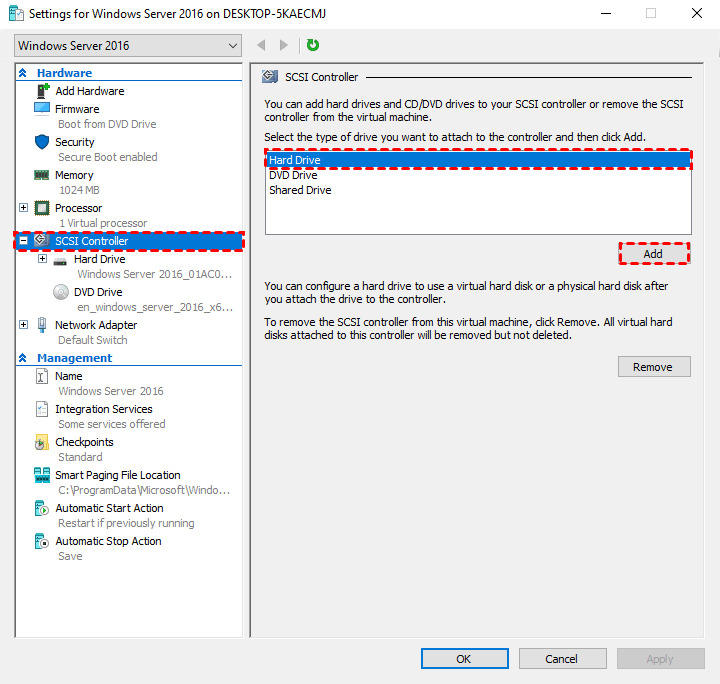
Launch your Hyper-V VM's File Explorer after adding the drive. The USB storage drive inside the VM should now be visible.
The Enhanced Session Mode offers an alternate method to use USB devices in a Hyper-V virtual machine. This client-side state allows the VM to use any USB device connected to the host PC by logging in to the console and choosing which devices to reroute.
Enhanced Session Mode has the following pros and cons.
Pros:
Cons:
Suggestion: Enhanced session mode is automatically enabled if your Hyper-V host is running Windows 10 or Windows 8.1, so you can skip step 4.
Using Enhanced Session Mode, follow these instructions to access USB devices inside Hyper-V.
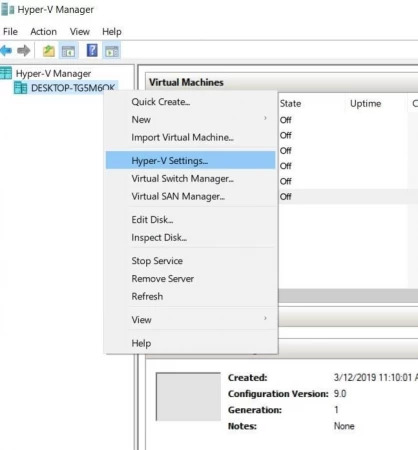
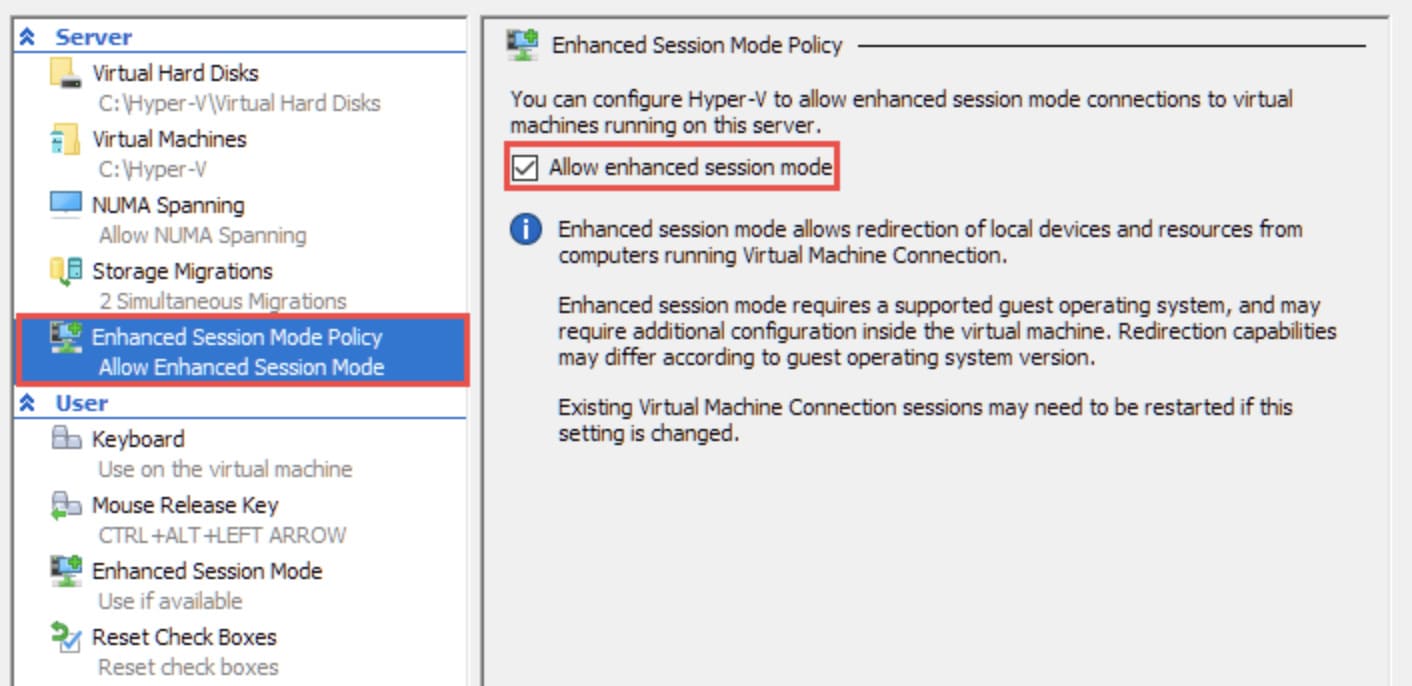
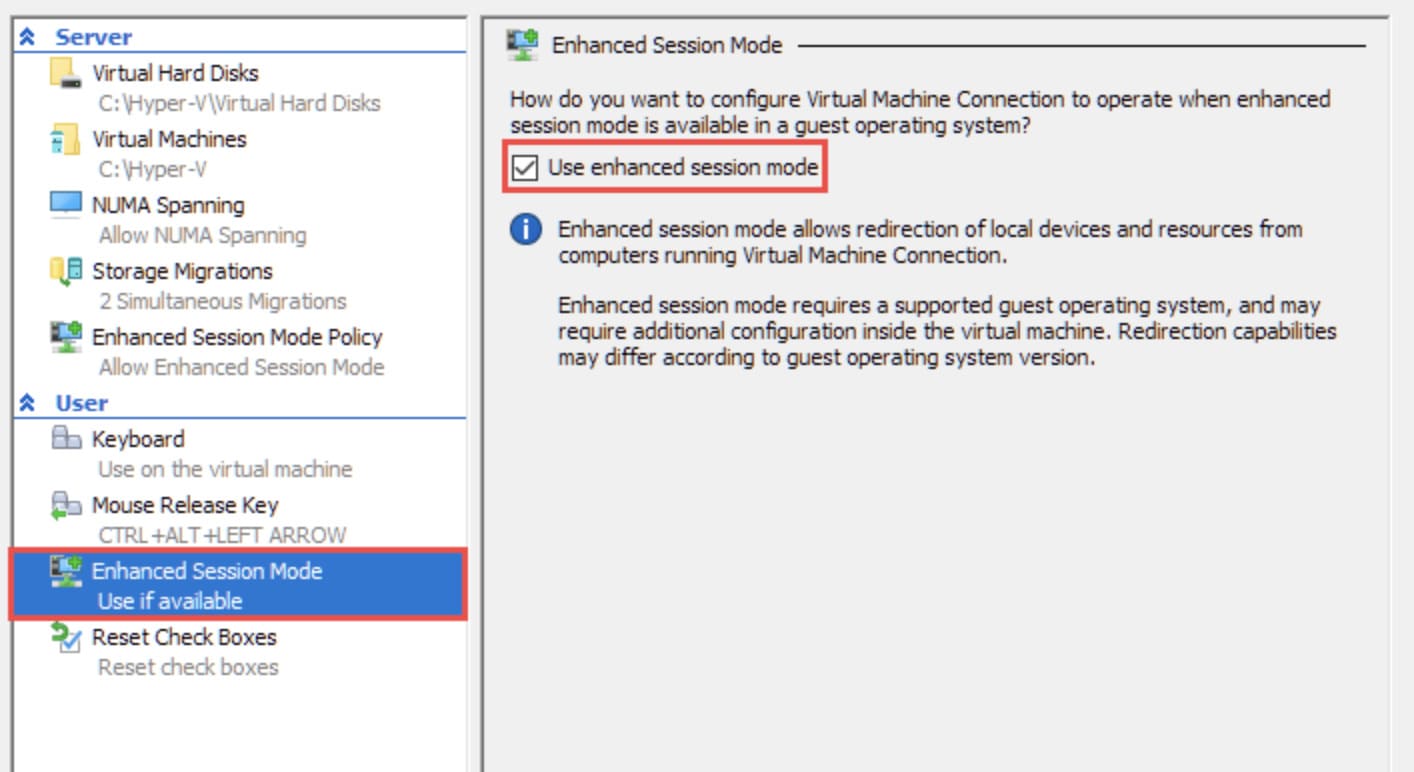
Finally, start the Hyper-V VM and open File Explorer to check the devices are connected to the system.
The aforementioned techniques of Hyper-V USB passthrough are quite powerful and will work in most situations. However, they will only work with the Hyper-V Virtual Machine Connection (VMConnect) client app.
The critical distinction between VMConnect and Remote Desktop Protocol (RDP) is that VMConnect allows you to access Hyper-V host-connected devices. In contrast, RDP can only access USB devices tied to the client.
The significant advantage of this technique is that it automatically works when RDP connectivity is enabled and is completely hypervisor independent. Nevertheless, it may not work with all devices and only Windows operating systems are supported.
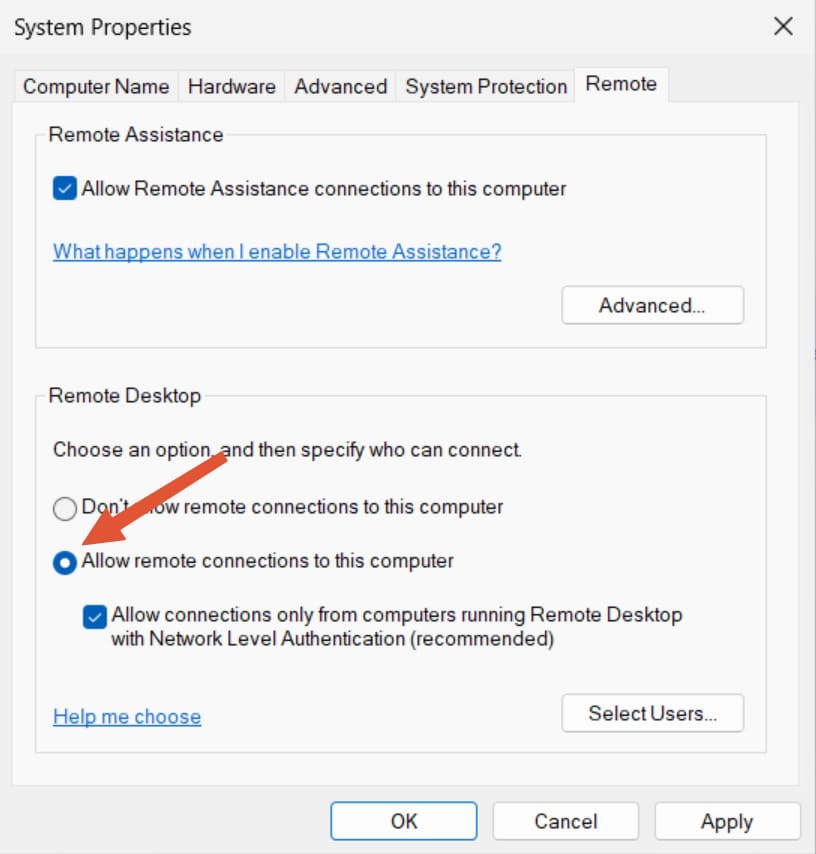
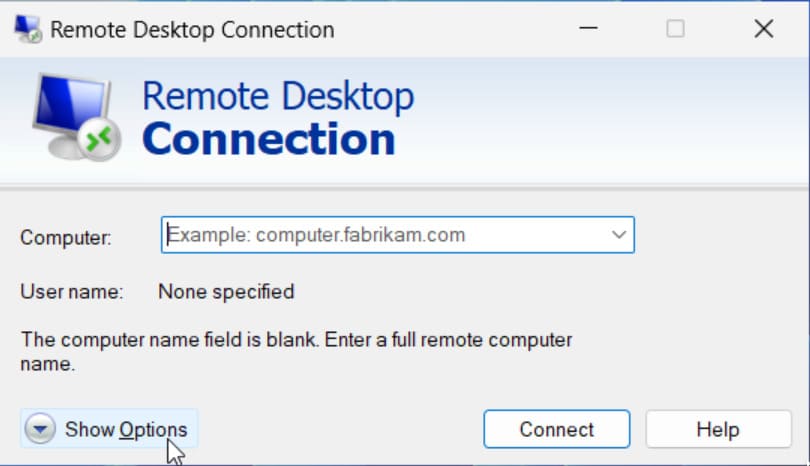
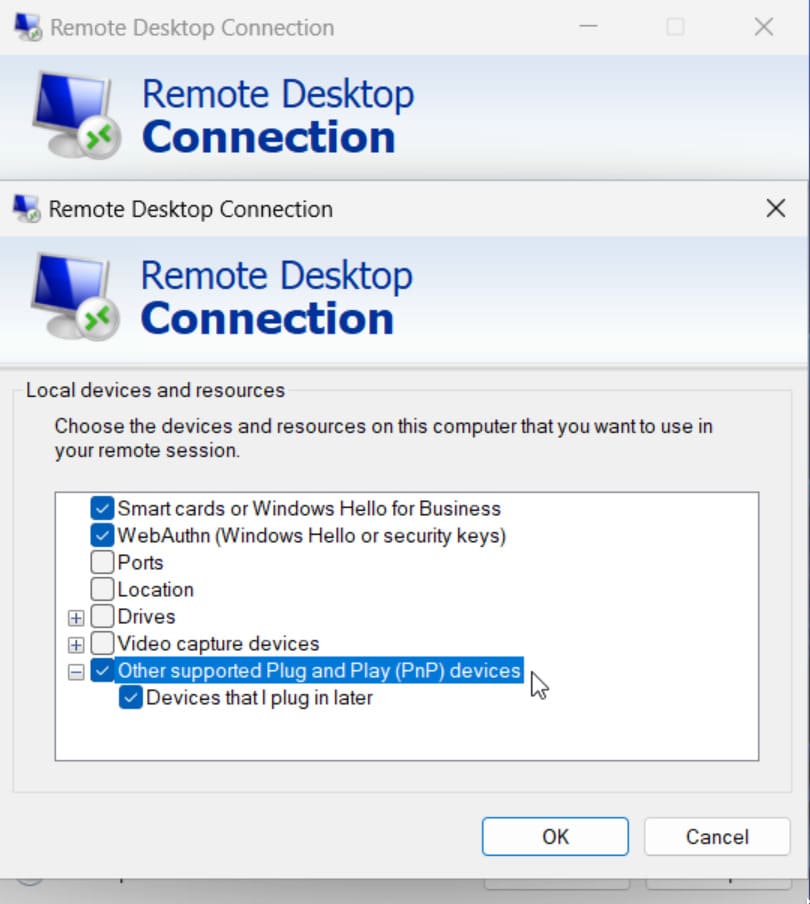
Simply follow these instructions to attach a USB device to VM Hyper-V during a remote desktop session.
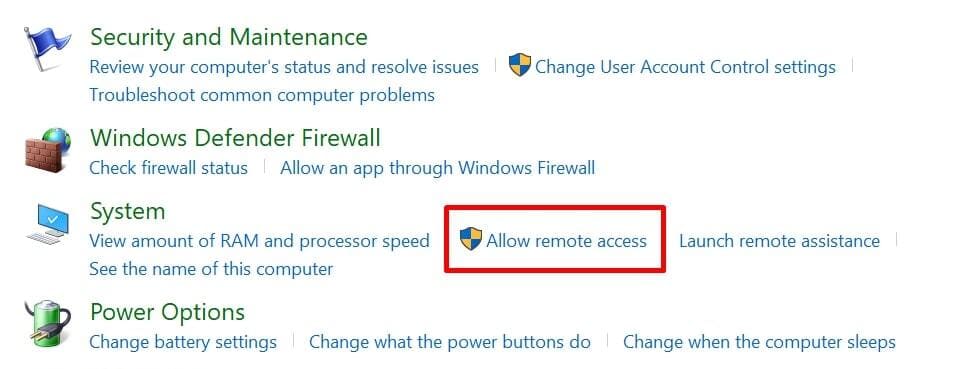


Enabling Hyper-V USB passthrough is considerably less complicated when you follow the correct procedures. Each method offers its advantages and disadvantages and works best for specific scenarios. Armed with this knowledge you can now choose the best technique to access any USB device inside a Hyper-V virtual machine.
UNG for Windows
UNG for Mac
UNG for Linux
UNG for Android