Cookie
Electronic Team, Inc. uses cookies to personalize your experience on our website. By continuing to use this site, you agree to our cookie policy. Click here to learn more.

How to access USB device in Parallels Desktop

Olga Weis Olga Weis Dec 16, 2019

Parallels Desktop is a virtualization software that allows accessing applications, files, and inferior operating systems on your Mac. Plus, Parallels Desktop is able to work with local USB devices connected to the host computer. In this article we’ll tell you how to share Parallels USB device attached to your host machine or any remote computer and connect to it from your virtual machine.

Contents


1. Local USB devices in Parallels Desktop
2. Access remote USB from Parallels Desktop
3. Versatile solution to forward USB to virtual environment

How to create a direct connection between local USB devices and Parallels Desktop
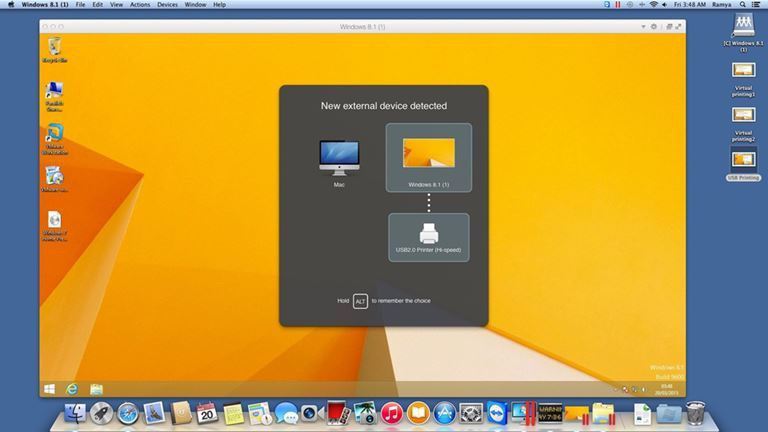
Connecting local USB devices and Parallels Desktop

To access USB in Parallels, follow these simple steps:

  1. Start your guest OS.
  2. Head to the main menu and click Devices → External Devices → USB (or another device). Now, when you reopen the same menu, you should see a tick next to the device you’ve chosen.
  3. That’s it! The device is now available for access from your Parallels Desktop, and is not visible on the host PC.

How to access remote USB peripherals from Parallels Desktop


As you can see, it’s no problem to access USB devices plugged into a host OS from Parallels virtual machine. But do you also know that Parallels Desktop can connect to USB devices inserted into any remote computer?

The dedicated software, USB over Network, will make your Parallels guest OS supremely more useful by making it able to access USB devices located miles away. The software solution is a simple and convenient way to connect USB to Parallels over network.

USB Network Gate logo

USB Network Gate

Share USB over Ethernet on Windows
4.9 Rank based on 372+ users, Reviews(372)
Download 14-day trial, You can share only 1 local USB-device
USB Network Gate

To provide Parallels USB passthrough, you just need to:

  1. Install USB Network Gate on the server machine (the PC with a USB device attached).
  2. Share the device over network.
  3. Install the software on Parallels Desktop, start the app, and click ‘Connect’ next to the required USB device. This is it! Now, the shared USB peripheral is connected to your virtual machine and displayed in its Device Manager.

This way, with the help of USB Network Gate Parallels can connect to USB over Ethernet or any other network.

Versatile solution to forward USB to virtual environment


Whether you use Parallels, VMware, Citrix XenDesktop, VirtualBox, or Hyper-V virtualization software, USB Network Gate will help you redirect any remote USB peripheral to your guest operating system.

Think of the possibilities:

  • The software lets forward a limitless number of USB devices over any network, including Wi-Fi, Ethernet, and the Internet;
  • supports cross-platform connections between different operating systems (Windows, Mac, Linux);
  • offers the traffic encryption option that guarantees security of your connections, and more.

With USB Network Gate you can not only provide Parallels remote USB access but also connect to your valuable USB devices over network from a wide range of other virtualization solutions.

small logo USB Network Gate
#1 at Networking Software
USB Network Gate
Share USB over Ethernet on Windows
4.7 rank based on 372 + users
Get a download link for your desktop
Submit your email address to get a link for quick download on your desktop and get started!
or
Also Available: USB Network Gate is a cross-platform solution compatible with Mac, Linux and Android OSes:

UNG for Mac

UNG for Linux

UNG for Android