If you have problems with webcam over RDP not working, in most cases, it has something to do with client settings, host policies, or drivers. Follow this troubleshooting guide and, most likely, you’ll solve the problem.
However, if you still have issues with the webcam even after going through the steps, you may have to use a third-party solution. USB Network Gate has a free version – more info below!
1. Change Client Settings
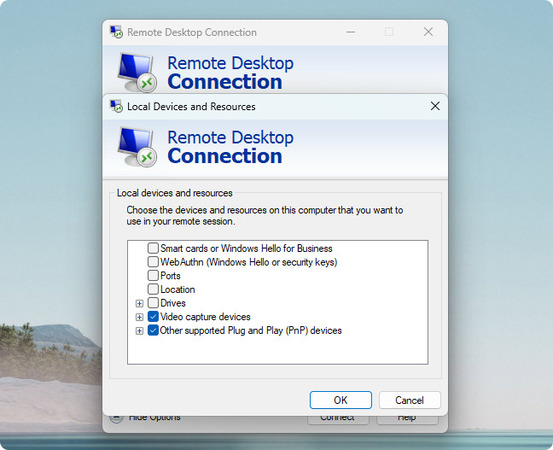
One of the simplest fixes you can try to enable webcam on Remote Desktop is changing the settings of the Remote Desktop Connection client. Do the following:
1. Open Remote Desktop Connection.
2. Click “Show Options”.
3. Go to the Local Resources tab.
4. Click “More…”.
From here, enable both video capture devices and plug-and-play devices (many webcams are plug-and-play).
Note that if you’re using Windows App, you don’t control redirection settings locally, and the setting is entirely up to the RDP server administrator. So you might need to contact them and ask about the settings.
2. Verify Driver Presence
When using native RDP redirection, you only need drivers on the local machine. However, it’s best to have them both on the client and the host. Since Windows often provides device drivers automatically, there’s a high chance that you can get a driver for your camera just by going to the Device Manager.
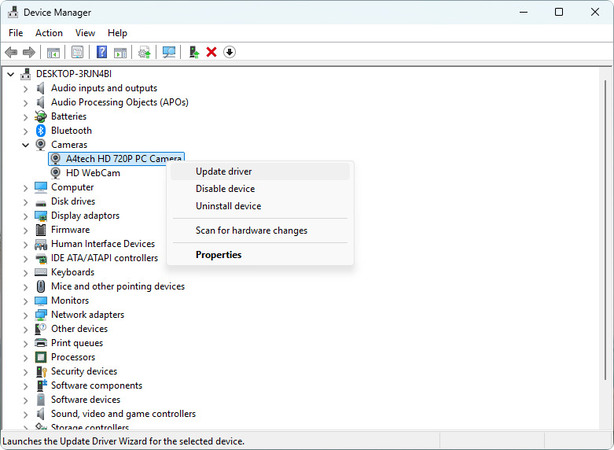
To update device drivers from the Device Manager, do the following:
- Press Win+X.
- Go to the Device Manager.
- Expand the “Cameras” category and find your webcam.
- Right-click it and select “Update driver”.
Some webcams may require you to download a driver. Go to the vendor’s official website (never download shady installers from third-party websites!), visit the Support section, and look for your product.
3. Set Host Group Policy
This is a way to change your redirection settings if the server is running an ordinary Windows OS, or Windows Server. These settings won’t change anything if enabled on the client. Also, you have to be the administrator on the server to change them.
More complicated environments, such as Azure, can also be configured via group policy, but are also commonly set up with Intune. Either way, as a client, you likely should contact an administrator or technician that can help you with this issue – once you’ve confirmed that it’s not on your end, of course.
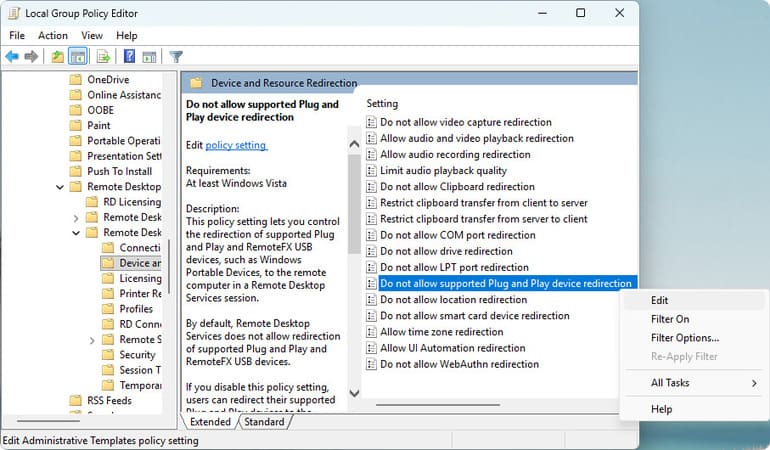
While the “Do not allow…” policy setting is often unset by default, it’s still worth checking, in case an application or a Windows update changed it. To set it to “Disabled”, follow these steps:
- Use the search bar to find and open the Group Policy Editor.
- Navigate to the RDP host settings: “Computer Configuration > Administrative Templates > Windows Components > Remote Desktop Services > Remote Desktop Session Host”.
- Locate the relevant setting: “Device and Resource Redirection > Do not allow supported Plug and Play device redirection”.
- Right-click the setting and select “Edit”. Set it to “Disabled” and confirm.
You may also want to restart your computer after changing the setting.
4. Use RemoteFX
Some webcams may not be supported by native RDP redirection. In these cases, RemoteFX can help. Rather than redirecting specific device classes (such as printers, mice, keyboards, and such), it’s more generic. However, RemoteFX requires extremely low latencies, as in 20ms or less, and because of this, it’s mainly intended for use over LAN.
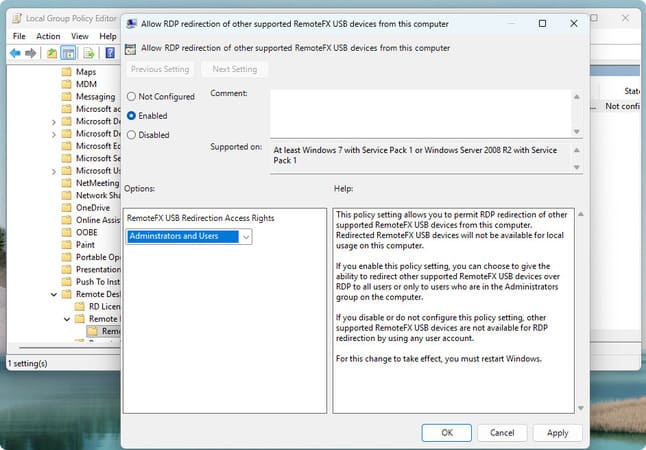
RemoteFX requires certain group policies to be enabled on both the host and the client. On the client, you need to go to:
Computer Configuration > Administrative Templates > Windows Components > Remote Desktop Services > Remote Desktop Connection Client > RemoteFX USB Redirection
And enable the “Allow RDP redirection of other supported RemoteFX USB devices…” policy.
On the host, you need to disable the aforementioned “Do not allow supported Plug and Play device redirection…” policy, since it also controls RemoteFX availability. It’s located here:
Computer Configuration > Administrative Templates > Windows Components > Remote Desktop Services > Remote Desktop Session Host > Device and Resource Redirection > Do not allow supported Plug and Play device redirection
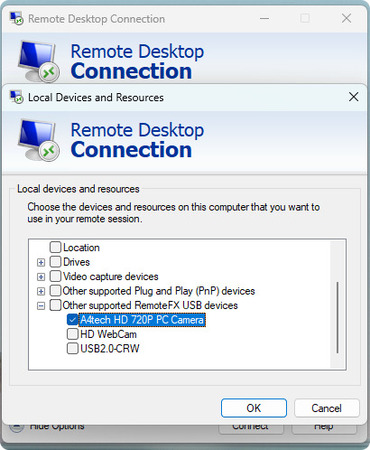
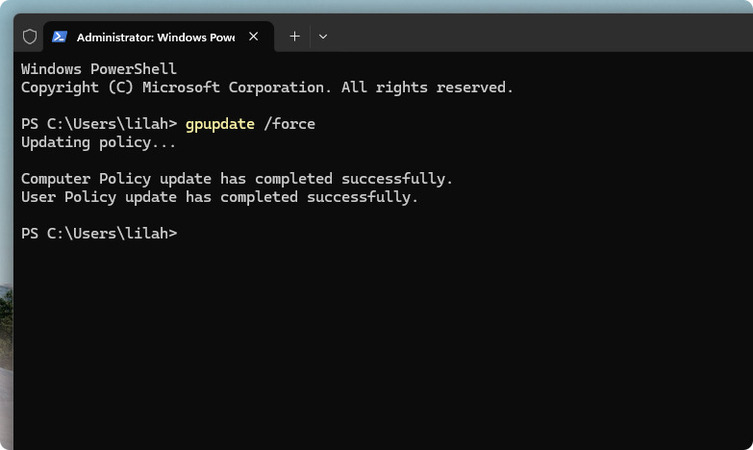
In the case of RemoteFX, in addition to simply changing the policy, you also need to run “gpupdate /force” in a PowerShell with admin permissions, and restart the computers. Once this is done, you will be able to select “Other supported RemoteFX USB devices” under Local Devices and Resources.
5. Try USB Network Gate
USB Network Gate perfectly fills the niche left behind by the removed RemoteFX feature. If your webcam isn’t plug-and-play, chances are, it can’t be natively redirected over RDP. However, USB Network Gate allows you to share any USB device on a network. It works identically to a direct connection, and only the RDP host needs to have the webcam drivers installed.
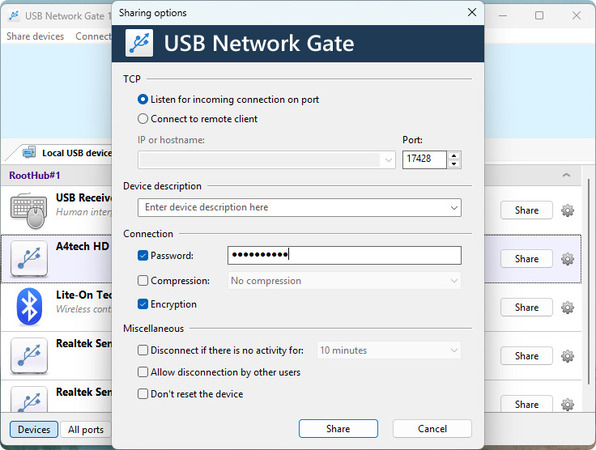
USB Network Gate has a free version that allows one device to be redirected at a time. Additionally, you can enable password protection, encryption, automatic disconnection, and other settings that will improve security and prevent your webcam footage from falling into the wrong hands.
How to Redirect a Webcam with USB Network Gate
1. Request a Free Version code and wait for the email.

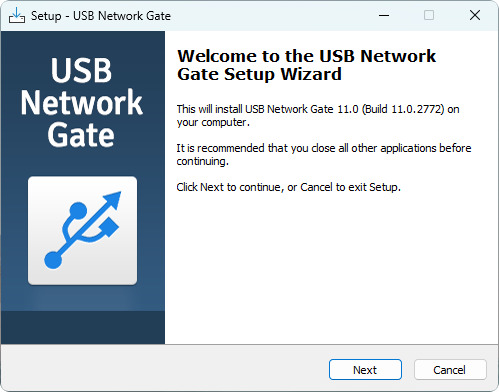
2. Download and install USB Network Gate on the computer that has the webcam plugged in.
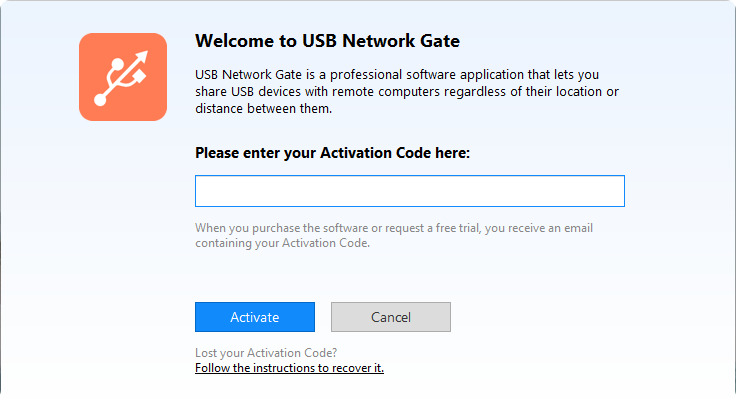
3. Activate USB Network Gate on the aforementioned computer using your Free Version code.
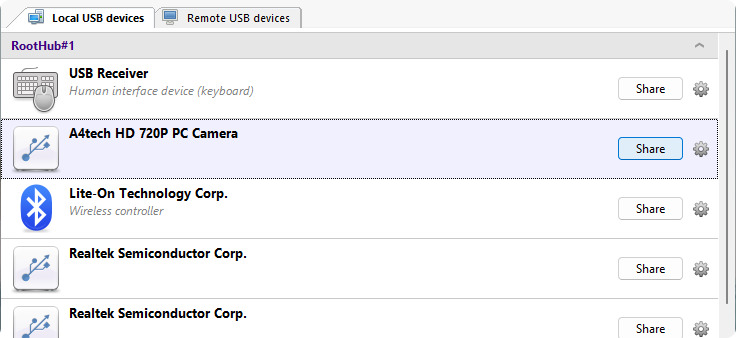
4. Launch USB Network Gate and click “Share” next to the webcam.
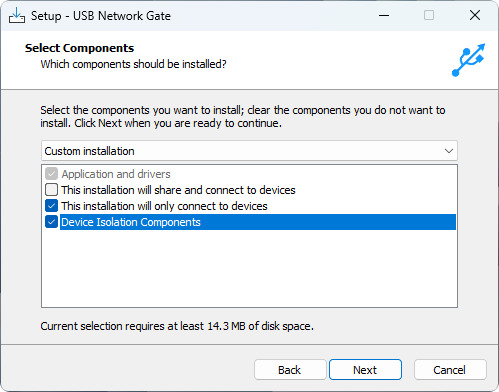
5. Now, enter an RDP session, and install USB Network Gate, this time with client-only settings (shown on the image). Restart the remote computer.
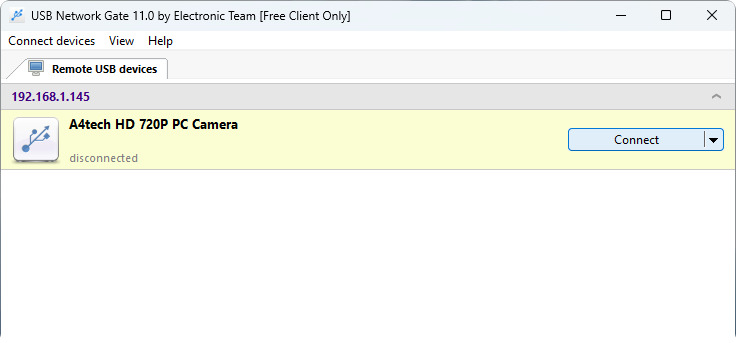
6. Enter the RDP session again, launch USB Network Gate, and click “Connect” next to the shared webcam.
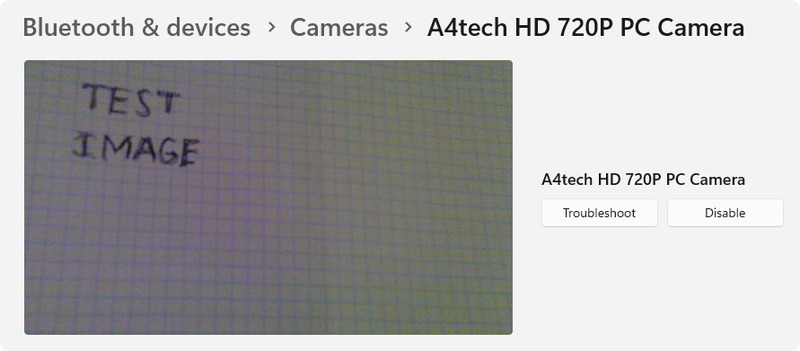
7. You can test the webcam by going to Settings > Bluetooth & devices > Cameras.
Note About Different Webcam Uses
This guide is directed at users trying to redirect their webcam for video conferences and similar purposes. However, if you’re more interested in webcams for surveillance, visit our article about remotely accessing webcams. It suggests some solutions that may work better in a home security context.